Android SDK Tools Installation for unity3d Simple Guide.
When you are building an Android app in Unity, make sure you arranged the Android Software Development Kit (SDK) just before you build and play any code on your Android device.Install JDK Before SDK
In case you don’t have a Java Developer Kit (JDK) it is important to download one from here before you can set up the Android SDK.
Install Android SDK
To develop an Android app you'll want to set up the Android SDK, and this can be downloaded from here. I installed the SDK to c:\android-sdk
Enabling USB Debugging
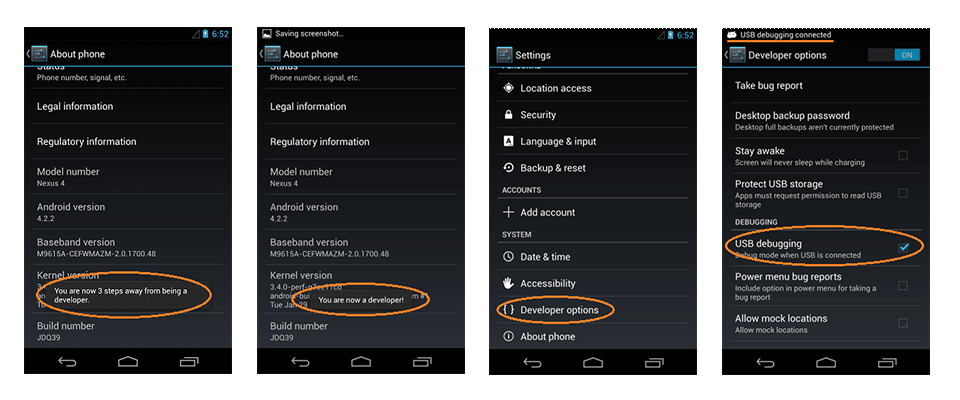 |
| Image source kingroot |
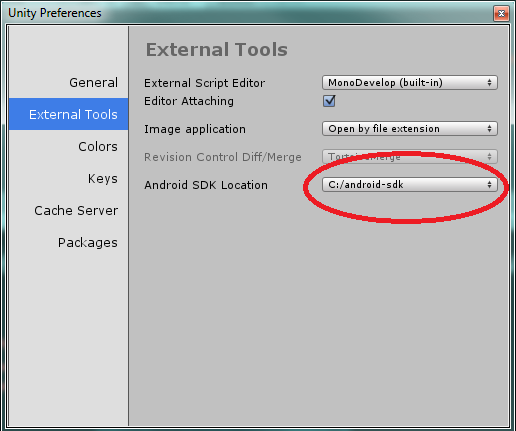
Set up the Android SDK path in Unity
Initially you create a Project for Android (or maybe if Unity later doesn't find the SDK), you're going to be requested to locate the folder in which you installed the Android SDK. Choose the root folder of your SDK installation. If you want to replace the located area of the Android SDK, in the menu bar see Unity > Preferences > External Tools.
Now switch your target platform to android and build your android game :)
See also:How to become a good programmer for beginners
Comments
Post a Comment